Mike and I often have a conversation about how picking favorites of anything is so childish and pointless. Why pick a favorite movie when there will always be more movies coming out? How can you even know? we ask each other. And each time we have this self-congratulating conversation about absolutely nothing, usually while flipping through Netflix with no end in sight, there's a little voice in the back of my head calling me a liar. Because I do have a favorite food. And it's ice cream.
This past weekend my friend Ron asked me what my favorite ice cream was, and I froze. I can't answer that, I apologized. Every ice cream has a different occasion. Vanilla is perfect for fresh-out-of-the-oven desserts. Chocolate is good when I'm feeling indecisive. I choose banana when I'm feeling healthy.
Then there are the crazy flavors: red velvet cake, bourbon pecan caramel swirl, Late Night Snack from Ben & Jerry's. There are not-quite-ice-creams like salted caramel gelato, blueberry and graham cracker frozen Greek yogurt, and Pinkberry's peanut butter whatever-it-is. There's frozen bananas blended with coconut milk when I want to relate to my Paleo friends and those chocolate ice cream sandwiches from Trader Joe's when I'm on the go.
This is all to say that popsicles, while not technically "ice cream," have their own time and place. And with weather reports threatening upwards of 90 degrees this week (there you are, not-Winter!), this is that time and place.
This is sort of a non-recipe; you layer pudding (store-bought, instant, or made from scratch), whipped cream (store-bought or made from scratch), and hazelnuts (or whatever nut you prefer!) into popsicle molds. The hardest part is waiting for them to set.
What you'll need
Chocolate pudding (I used Hershey's Special Dark because I impulse-bought it a month ago and why not?)
Whipped cream (I made this from scratch by combining ~1/2 cup whipping cream, 1/2 tsp vanilla, 1 tsp sugar in a mason jar and going to town [that means shaking it really fast, not actually traveling to town])
Chopped hazelnuts
1. Make the pudding according to the package instructions (or make fresh pudding and share the recipe in the comments!). Let set in the fridge while you make your whipped cream.
2. If you're using store bought whipped cream, then chop your nuts now. Otherwise, combine whipping cream, vanilla, and sugar in a mason jar and shake it until it resembles whipped cream and before it becomes butter.
3. Chop your hazelnuts.
4. First layer the pudding, then the whipped cream, and top it all off with your chopped nuts. Leave a little room for the filling to expand while freezing.
5. Let freeze for at least 4 hours or until you just can't stand it anymore.
6. Optional: Eat any remaining chocolate pudding with any remaining whipped cream and top with whole hazelnuts while you wait.
Update: I had every intention of taking pictures while Mike and I ate these delicious and genius pudding pops, but they didn't actually want to come out of the molds. Either way, these were delicious eaten off of spoons dipped straight into the molds. Next time I'll just layer these into paper cups and peel them off when we're ready to eat.
5.30.2013
5.29.2013
Around here | Evening walk after rain.
Now that the weather has begun its transition into summer, Mike and I have been going on evening walks after dinner. After almost a full week of rain, the skies cleared in time for us to stretch our legs. I always love seeing photos of Meg's New York, so I think of this as my own version of that, my Cambridge.
5.23.2013
Family stories.
5.22.2013
Made | Chocolate Peanut Butter Cake
Here's something I've noticed as I get older: not everybody grew up thinking birthdays were the bee's knees. Isn't that crazy? I've also noticed that I take it as my responsibility to reveal to them how awesome—and delicious—birthdays can be. Let's start with Mike.
Cyndi made this cake to celebrate her and Zander's anniversary, so I luckily had a firsthand account of what it's like to make this. I have a bit of anxiety when it comes to making cakes from scratch. They always look better in the pictures! But I knew Deb wouldn't let me down; her recipes are always on par with her awesome pictures. So after much hemming and hawing, I buttered my pans, lined them with parchment paper, and lined them again! (Note: The recipe calls for three layers, but I have only two pretty deep cake pans, so I went with that. It turned out great and there was no spillage.) Then I gathered my ingredients.
I'm usually a spontaneous baker, so gathering my ingredients beforehand and buttering the pans as directed was a huge step in the right direction for me, and it shone through in the cake. They baked up in 35 minutes and I let them cool for a good 20 minutes before even thinking about touching them. After 20 minutes, I turned them over onto more parchment paper on top of my wire rack.
Then I froze them while I made the peanut butter icing. I made this on a beautiful warm day, so freezing them to make them easier to handle was a no-brainer.
And I assembled my peanut butter icing ingredients.
And proceeded to make a big mess. Powdered sugar and hand mixers aren't friends.
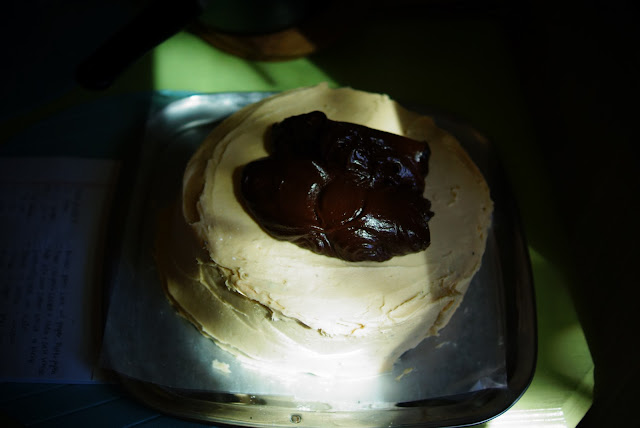
I pulled out my frozen layers and assembled! What you see below is a crumb layer of peanut butter frosting. I then chilled the whole thing and applied the rest of the frosting.
While that chilled in the fridge (and after a good 15 minutes trying to rearrange everything to fit a cake pan in there), I assembled my chocolate ganache ingredients (not pictured: peanut butter!).
I was all excited about using my new baking scale for this recipe, but alas all of the ingredients were in volume measurements. But you bet I jumped at the chance to measure out 8 ounces of chocolate from the Trader Joe's pound of chocolate I bought for the occasion.
Chop, chop!
Combine the corn syrup, chocolate, and peanut butter in a double boiler (or your preferred chocolate melting method; I just bought this handy boiler insert from IKEA recently), and stir until melted. Remove it all from the heat and mix in your half and half.
It glistens!
Dump all of that glistening chocolate ganache on top of your finished cake with peanut butter icing and you've just raised the stakes.
Spread it out until it runs down the sides. (Note: My ganache didn't turn out as liquidy and oozy as Deb's did, which I attribute to my boiler being too close to the bottom of the pot when I melted it. Slower melting is better and makes for a more even ganache.)
But still, no complaints.
Pop that sucker in the fridge until you're ready to serve or for at least 30 minutes to let the icing set. Throw some birthday candles in there and get your friend with a sprained ankle boot on to carry it into the living room.
Watch birthdays become magical again.
Recipe after the jump.
5.21.2013
Flashback | Atlantis
The whole week has been calling for rain, so I find myself combing through photos from our cruise more often. We took a long walk to the park last night before the big rains came last night, and I'm planning to read to the sound of it tonight. A long day at work and gray skies call for a reminder of places we've been, don't you think?
5.20.2013
Made | Super secret steak kabobs & the camping season begins!
One of my favorite memories of living in Saipan when I was a kid was walking over to this little shack in a parking lot in front of a convenience store near my grandma's house. From afar, it was a tiny hut hardly big enough for two people to stand in, mouthwatering smoke coming out the vent in the roof. There was always one guy in there, barbecuing the most tender and tasty meat kabobs you've ever had. He had chicken, but we always went for the steak. When I was home in April, I asked my mom and my sister if they remembered that guy, and my mom laughed and said, "Of course, Mel! I even got his secret recipe for the marinade." Be still my beating heart. This past weekend we put the recipe (below) to the test.
Even at 8 AM on a Monday morning, the sight of those kabobs makes my mouth water. We went camping at Burlingame State Park in Rhode Island this weekend to celebrate Mike's birthday. Our friend Nicole drove over from Philly to join us on Saturday, and we had quite the feast that night. Nothing washes down steak and veggies like s'mores (peanut butter cups & dark chocolate & caramel bars squished in there).
Meat-on-a-Stick
What you'll need:
1.5 lbs steak (cut into cubes or long strips)
1/3 cup soy sauce
1/4 cup Asian Ginger marinade (we use Ken's brand in the salad dressing aisle, but any soy ginger sauce will do)
2 tablespoons white vinegar
A couple dashes of hot sauce
Salt & pepper to taste
And the secret ingredient...
7 UP! (We used Sprite because it was cheaper)
1. Combine everything except the steak and 7 UP in a medium bowl. Once mixed, taste with your finger or a spoon to be sure it's the right spice for you.
2. Add a splash or two of the soda, tasting until it's the right amount of sweetness for you.
3. When the flavor is perfect, add your cubes or strips of steak. Cover the bowl tightly, or if you're going camping, put the meat and marinade in a sealable plastic bag and place it over ice.
Grill to your preference and serve alongside a coal cooked potato, corn, and veggies.
What's your favorite camping food? We always make kabobs when we're camping out.